Monday 30 December 2013

INVITATIONS

In March, it's my grandparents Golden Wedding Anniversary, which is going to involve some odd 80 family members and the place they had their Wedding Reception at originally all those years ago! They hadn't wanted to worry me with more to do in amongst all my school work and UCAS - still haven't sent off my application, aaargh! - but little did they know, I'd already drawn all this up! That was back in November, but whilst they were down here for Christmas we took some time sorting it all out properly. The top right image has been put into invitations, and all 3 put onto their menus for the day - but I think what we were all most pleased with is that we've made them ourselves from start to finish! I had a bit of trouble with my old, and pretty temperamental printer, but we got there in the end by experimenting with it, and the end result is that these were made all for the cost of a pack of A4 card from WHSmiths (about £2!), a printer cartridge and one of those mini guillotines (again, only like £5!). Shows what you can do with photoshop and a bit of creative DIY!

If you want to download the font I used, I got it here.
(quick picture of the finished thing!)

Saturday 23 November 2013

JEWELLERY


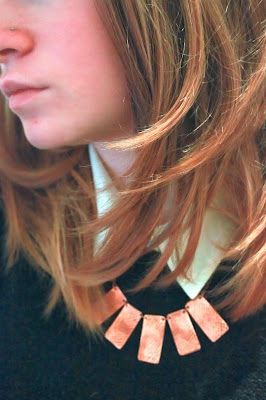
I finished my jewellery unit yesterday! Feel kinda sad about it because I've really enjoyed it, but it's encouraged me to keep on the craft and decorative arts route - all the way through this project my brain has been full of ideas and there was so much more I wish I could have made if I had more time! These are a few pictures of the finished things for my sketchbook, but I really don't think I can explain how proud of them I am - some of these pieces were so simple, but have turned out brilliantly and look really effective! I'm going to spend the rest of my evening watching Dr Who (super excited about it!) and filling out my sketchbooks - I'm starting to plan my final project now and notebooks are filling up fast! 

Friday 15 November 2013

FRUIT


(from left to right)
f/9 1/60
"
"
"
f/9 1/40
"
f/9 1/15
f/9 1/40
f/9 1/320
For these, we turned on a light box, and photographed different fruits. First, we worked with whole fruits by placing them on a sheet of paper and wrapping it up and above it to reflect the light down on the object. This made the fruit look sort of like it was floating, and the best example of it would be the 5th photograph above. We tried this effect with apples, oranges, pears and bananas, but I think the red colour of the apple meant it worked best at reflecting light properly and showing up really well.  We then started to cut up the fruit into sections, and lay it out over sheets of acetate to get light to shine through it. We found that just having a sheet of acetate made the fruit look quite shadowed when we photographed it, but by putting a sheet of white paper underneath the acetate, the light was dulled a bit and it made it a lot easier to photograph. I really like how the colours of the fruits worked together, and I think the best photos I took were some of the close ups with a really shallow depth of field - you can see all the other colours blurred in the background and it looks really lovely! I also think I prefer the photographs of the cut up fruit to whole fruits - they look a bit more abstract and decorative then just a single piece of fruit. We did try and make the single pieces of fruit slightly more interesting though by doing things like taking a bite out of them or slicing them up.

Thursday 14 November 2013

ILLUSTRATE

Illustrations of a few of my sculptures from school, getting into photoshop again recently and trying to use it a bit more for drawing!

Sunday 10 November 2013

CAKES

I'm beginning to make a serious effort to become a better cook - too often my cakes are pretty rubbish; I had one the other day that just collapsed which was pretty odd! I quite often improvise a bit too much, put ingredients in that aren't needed and it always ends in disaster - I really should learn from my mistakes more! These beautiful cakes were just normal sponge mixture, but we scooped out the middles and put in some homemade lemon curd and then added buttercream icing (which has a sneaky bit of lemon curd added to it!). They were delicious, and just to make it that bit better I was pretty happy with these photos!

Saturday 9 November 2013

RECTANGLES


A couple of pieces of jewellery I've nearly finished. I think it's been one of the best units I've done so far on my BTEC, because its so different and involved learning so much! We got to learn basic metalworking techniques at the beginning, but for the last couple of weeks have been designing our own jewellery and exploring all these techniques put together to make whatever we want. The designing and putting skills into practice has probably been the best bit, and I've actually been really proud of the stuff that I've made (it's all pieces I would wear myself, which I think is important because it makes it more personal!). In other news, I've been to an open day today and I think I may have found my perfect uni and course, which is really, really encouraging! I feel all inspired after it, and ready to get on with more projects at college just to get my portfolio looking great.

Wednesday 6 November 2013

SHAPES


At college we have a week where we make artwork to be sold in an exhibition - every piece is 10 x 10 inches and sells for £10. I had a few ideas for these and this is what I ended up with; lots of smudged about paint which made some really cool shapes. I've then mounted them on some really nice card, and overall I think they look really good - first piece of work I've made in a long time that I really like!

Sunday 3 November 2013

SAATCHI : PAPER


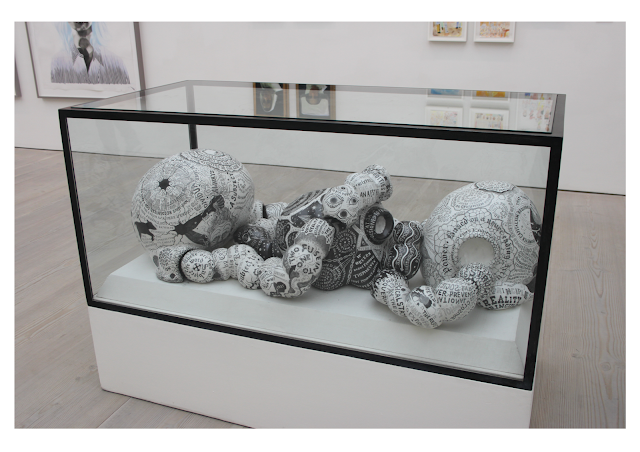
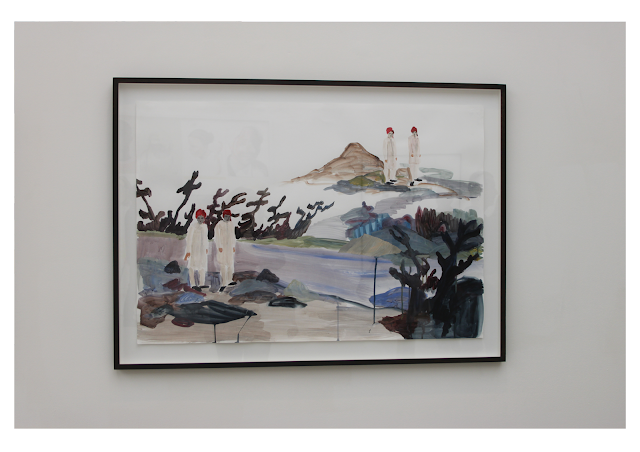
Having not been to an exhibition in a while, this was absolute bliss. Not only is the gallery really, really beautiful (pale wood and white walls and calm lighting, what's not to love?) but I was quite shocked by how much I enjoyed the artwork. There was so much difference from piece to piece and it was all really inspiring - these are just a small selection of the photographs that I took whilst I was there. I've been struggling to come up with any ideas for my own artwork recently, and it made me remember just how much looking at art and just spending time in galleries can really motivate you and help with being creative. My favourite piece is the last photograph, with all the different portraits - they're great, and despite all being so different just seem to match really well - but I would say it's definitely an exhibition which is worth going to see for all of the artwork in it.

Tuesday 29 October 2013

LONDON


We went on a trip to London today, and this is what I came back with - lots of double exposure photos and also a little collection of books and pens from Muji!

Friday 25 October 2013

SCULPTURE

Once a week I have a sculpture unit, and the materials we were meant to use this week were all organic and natural. I had these beautiful rocks (from france and wales), a small pile of shells and driftwood, and lots of slate. I decided to pile up the stones into this shape, and initially I'd planned to work into it to make lines over the top which all joined up and could then be filled with coloured PVA which would look sort of like resin. What I ended up doing was putting it on a block of wood, and pouring some PVA I coloured white from the top and seeing where it went. I think my favourite part is how its pooled at the bottom, and how cool it looks from certain angles. 

Thursday 24 October 2013

LIFE

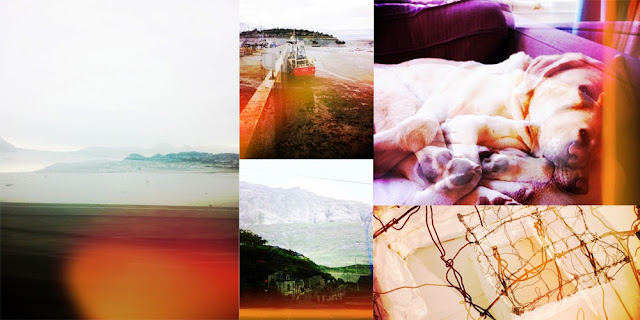
Over the last couple of weeks I've been starting to think about work for my portfolio, and one of my current little projects is a photo book. I've got an amazing app on my phone, which makes these double exposures (it's called ClassicToy) which I hadn't used for a while, but had a go on whilst I was on holiday and fell in love with the photos it makes all over again! My plan is to collect about 100 of these, and put them all together - it should make a little book that's really amazing to look at!

Wednesday 23 October 2013

COLOUR


Got a day off today, so I got started on something that really needed doing. My portfolio needs starting soon, so thinking about what I want to put in it is really, really exciting. When you study art full time, getting a chance to make things you actually want to can be a bit tiring - trying to think creatively after a whole day of thinking creatively isn't what I'd call fun! So when I get a chance to make some artwork, it really is quite a treat.

The middle of these drawings was done in the Orangerie in Paris, where since my last visit they'd stopped visitors from taking photos, so I decided that I'd have a go at drawing some of what I saw (I had some lovely passport notebooks from Muji, that are perfect for taking notes and drawing in galleries!) The other two are water related, and I'm not quite sure that they work, but all the same it was nice to have a go at them.

Whilst currently writing my personal statement, I realised quite how important it's going to be for me to have some personal artwork, created outside of education, and this has started getting my head into the right place for making some cool stuff! I'd strongly recommend just picking a theme, and painting, colouring, and just making a general mess, because I now feel ready to go and have a go at something else!

Tuesday 1 October 2013

BOOKS


I've been doing sculpture at school now for a few weeks, and this was for the week based on 'books'. I got a balloon, pasted on some ripped up book pages, and got this globe shape which I didn't know what to do with. Eventually I got a brainwave, and cut a hole through what was left of the book and put it onto a lamp stand. I then put in a lightbulb, put the globe over the top of it and got this really cool effect!

Thursday 18 July 2013

SEND


Picture heavy, I do apologise. Which one do you guys like the best? Thinking about my future lately, and whether or not university is going to be worth it. Latest plan, is to live at home and work as much as possible so I can finish Uni with no debt whatsoever - after that, I'm a bit stuck. These are for a business idea (another one, I know), but I'm seriously hoping this one will work out! I'm sure there's some famous quote about someone starting hundreds of businesses that all failed, and the last one they did was something amazing - here's hoping it'll be me!

Sunday 16 June 2013

TEAPARTY


We got a little over-excited in half term. Ended up spending £15 in Tesco on tonnes of cakes (who thought you can get so much for that amount, seriously, like we filled a trolley!) and threw a tea party!

Saturday 15 June 2013

URSUS MARITIMUS

Hey guys! I apologise for my absence recently, basically finished college for this year now (so I've had tonnes of work, it's been a bit too busy for me!), just got a couple of weeks now where I've got to be in working on stuff, so I'm going to take advantage of the printing facilities and get on with some of my arts award - and TALKING ABOUT PRINTING. Tomorrow is fathers day, as I'm sure you're all aware, and I wanted to make my dad something special - so this is what happened! I'll put a little how-to later in the post, but basically I made a huge stencil, then just printed over it with my screen - he loves polar bears, so I thought it might make a cute design!
It can go a little messy, but I think that adds to the charm really!

How to Screen Print with Stencils at Home:
You will need:
  • A Screen! (if you haven't got your own, you can make one by stapling screen material to a screen printing frame or even, if you're feeling a bit DIY-y to a canvas frame (which you can get from the works for about £2, then just strip the canvas from, easy peasy!))
  • A squeege - can't print without it!
  • Lots of paper, card, etc
  • Printing inks, or, if you're like me and haven't got any hanging about, some paints you can mix up to the consistency of yoghurt - I used a mixture of blue and white poster paints and blue and white acrylics.
  • A scalpel and cutting mat
  • Pens, pencils, rubbers and rulers
  • Lots of newspaper, a bin bag and tissues
1. If you're feeling a bit unsure, plan your design out on some scrap paper - keep it simple, you're going to have to cut everything out easily, and it's near impossible to keep text with gaps in the middle - hence why the r's and a on my prints are filled in.
2. Draw it out precisely onto the size paper (or card - in hindsight I think that would have worked slightly better as it's a bit thicker - cereal box cardboard or just normal card) you want to print with - anything cut out will be printed, and anywhere there's still paper won't. You can use the things you cut out to print with after, so if you want to do so make sure you cut it out in one!
3. Making sure to use a cutting mat, and being super careful, cut out the pieces from your stencil.
4. Tape the stencil (if it's one large piece) down to the paper you're printing onto, or if you're using lots of pieces just back them with a bit of rolled up masking tape so you can pull them off once you've printed.
5. Mix yourself up some ink with a brush or spatula, and lay out some newspaper for putting anything that gets messy onto - also open up a bin bag.
6. Place your screen on top of the stencil (if it wasn't obvious, the mesh should be touching the paper, and the wooden frame should be facing upwards) , dollop some ink at one edge, and then drag it across using your squeegee - repeat and move the screen if necessary until you've printed all the areas you need to.
7. Put your squeegee on the newspaper, and lean the screen up somewhere where it cant get ink everywhere.
8. At this point I personally started drying the paper with the stencil still on it with a hairdryer, but you can peel the stencil off first - then put the stencil in the bin bag, unless it's re-usable - if you used paper, it probably won't be!
9. If you've used non solvent based paints, take it to the bath/sink/out in the garden and wash off your screen and squeegee.
10. Leave your print to dry, and voila!

Saturday 18 May 2013

MORNING LIGHT


She still loves having her photo taken, it's ever so cute. This was before I headed to college, just had a little hug with her!

Wednesday 8 May 2013

FLOWERS + GRADIENTS


So, more fabric samples from the liberty website here + my graphics over the top. I'm on a roll here! When I actually print these I think i'll use some fabrics from a lovely little shop in town, but these fabrics are just too beautiful (albeit very expensive) too ignore!

Tuesday 7 May 2013

MORE WORDS


Done a few more like yesterdays. Now realising quite how much I'd missed photoshop on my old laptop!

Monday 6 May 2013

WORDS


So I’ve been REALLY enjoying screen printing at college right now. I’ve made some stuff similar to this for a project, and was thinking about making some designs to frame. What do you guys think?
(as a point of reference, the fabrics in the background of these are from here)


Tuesday 23 April 2013

VIDEO


Thought I'd share this, with all of you. Just a little video made by the artist we're working with this year on Slow Boat, I'll paste the basic explanation below, but I'm super excited about it!

"Each year a contemporary artist is in residence with IYP, developing a programme of activities both on and off the boat. We are delighted that Navin Rawanchaikul is our lead artist for 2013. Inspired by his Thai and Pakistani heritage Rawanchaikul is planning our most colourful journey to date, travelling from Birmingham to the East Midlands, stopping off in Derby, Nottingham and Leicester. During this trip Slow Boat hosts Navinland, a floating campaign to find others who share his given name, Navin, with celebratory events along the route."


Thursday 11 April 2013

TILES


Today we started a new unit at college - Fine Art basically. The task we were given was to draw the room we're working in, then turn it upside down and put a portrait into it, then turn it upside down again and draw any object on top. I've got another 5 hours to work on it, but these tiled portraits are for the middle section of it - unfortunately its A1 so I can't scan it, but I'll somehow get a good picture of it in progress soon!